Quick start with Godwoken testnet
Nervos supports the use of Ethereum-compatible smart contracts, which allow developers to create dApps using the popular Solidity smart contract language. This is done by running the EVM (Ethereum Virtual Machine) in a Layer 2 based execution environment using the Godwoken and Polyjuice frameworks.
EVM dApps run nearly identically on Nervos as they do on Ethereum. This, in turn, allows dApp users to continue using the popular MetaMask wallet without having to install anything new. DApp users who are familiar with Ethereum will feel right at home!
Introduction
In this tutorial, you'll create a Godwoken account on Nervos' EVM Layer 2 Testnet. Creating a Godwoken account is the first step that all users must perform on Nervos' Layer 1 blockchain before they can begin interacting with EVM smart contracts on Layer 2.
We will focus on Layer 2 in this documentation, so you don't need to think about Layer 1 too much right now. Alright, let's start creating an account!
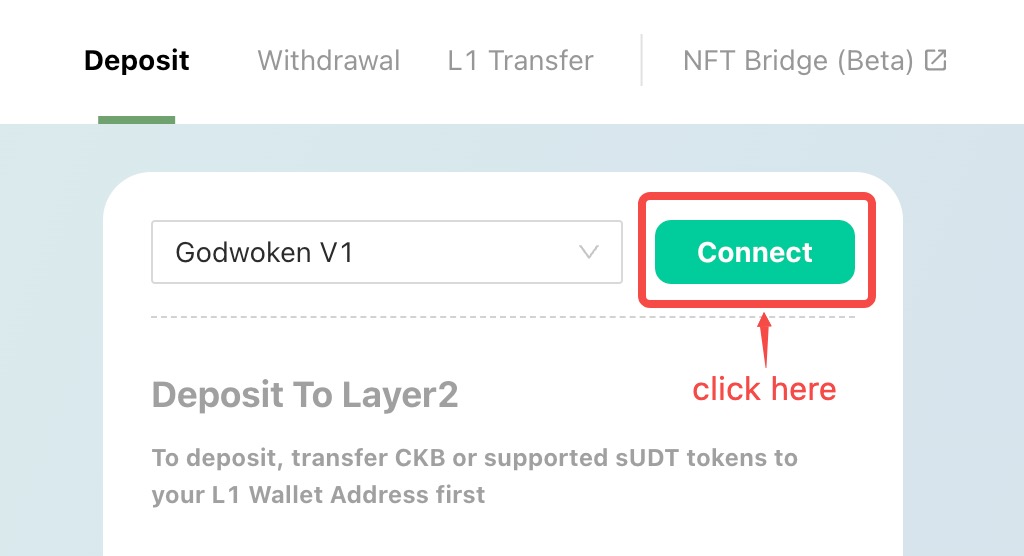
1. Go to Godwoken Bridge
Start by visiting testnet.bridge.godwoken.io. Make sure MetaMask wallet is installed in your browser.
Connect your MetaMask account to the page by clicking the "Connect" button.
2. Fund an Account with CKBytes on Layer 1
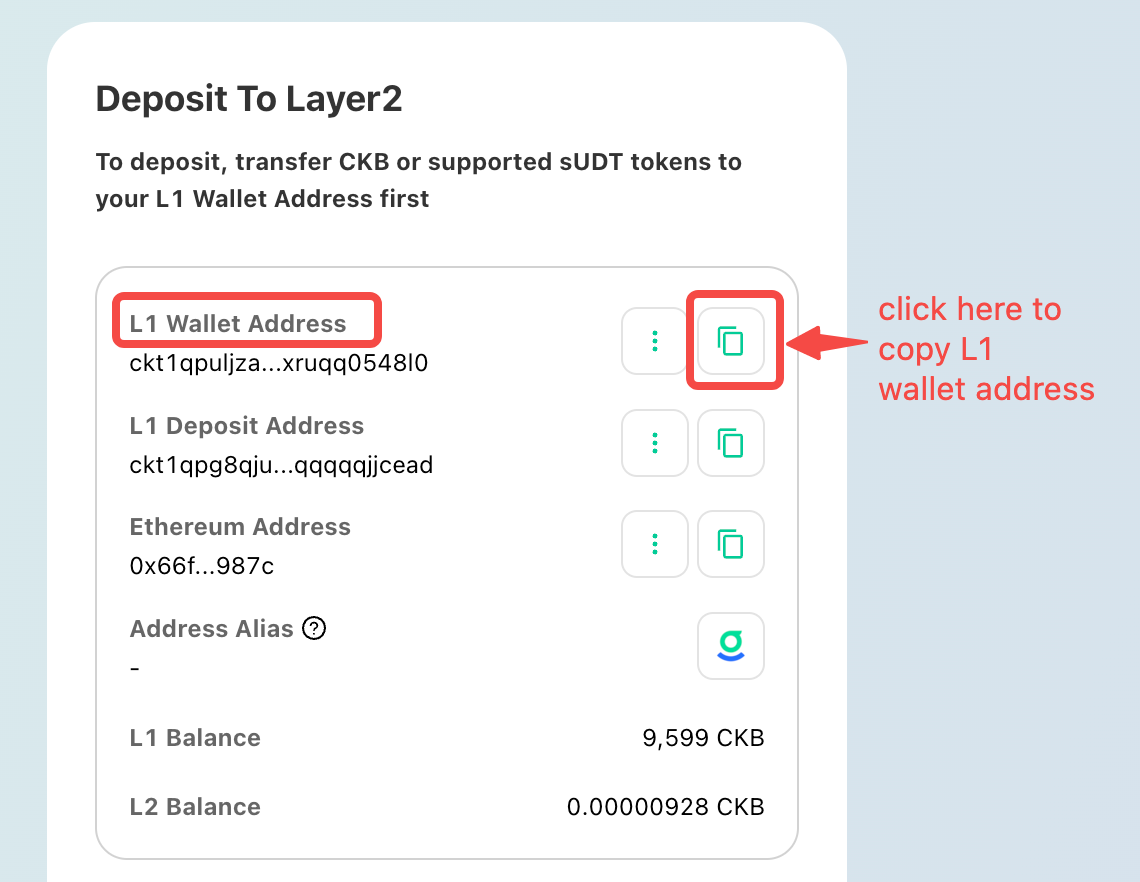
2.1 Occupy Layer1 Wallet Address
You have to fund your Layer 1 account. It will be the source of funds for Layer 2 deposit. To accomplish this, click "Copy Address" to the right of "L1 Wallet Address".
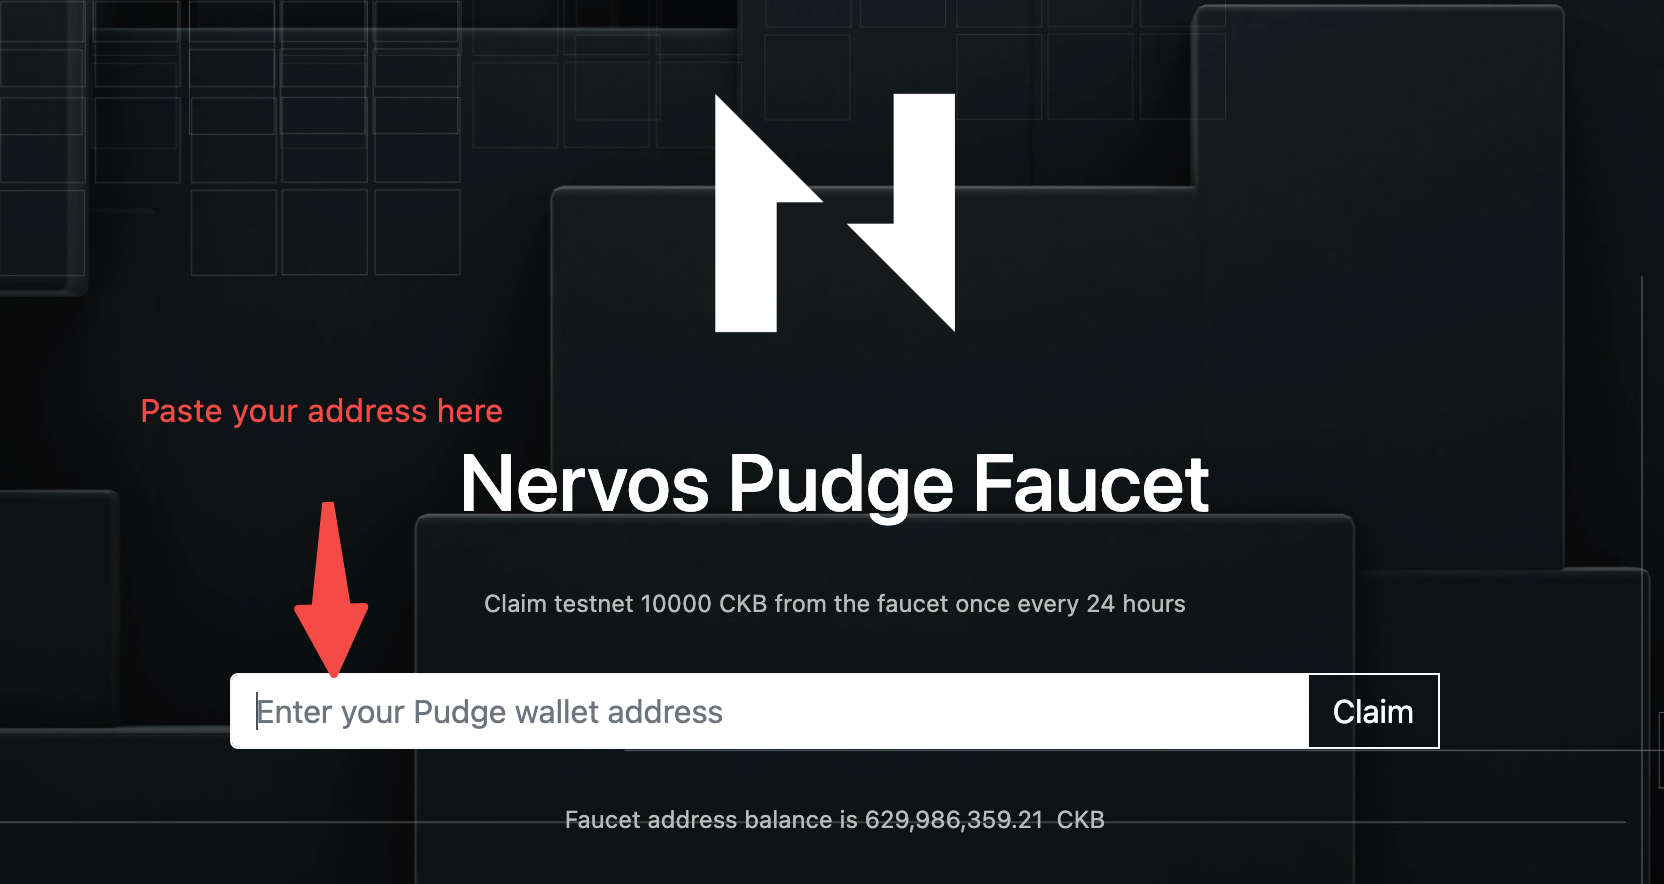
2.2 Claim CKB from Testnet Faucet
Now, visit the Layer 1 faucet where you can request Layer 1 testnet funds: faucet.nervos.org.
Paste the copied address into the faucet and click "Claim".
Now, wait for your Layer 1 transaction to be completed. You should see your transaction in the list in the middle of the page.
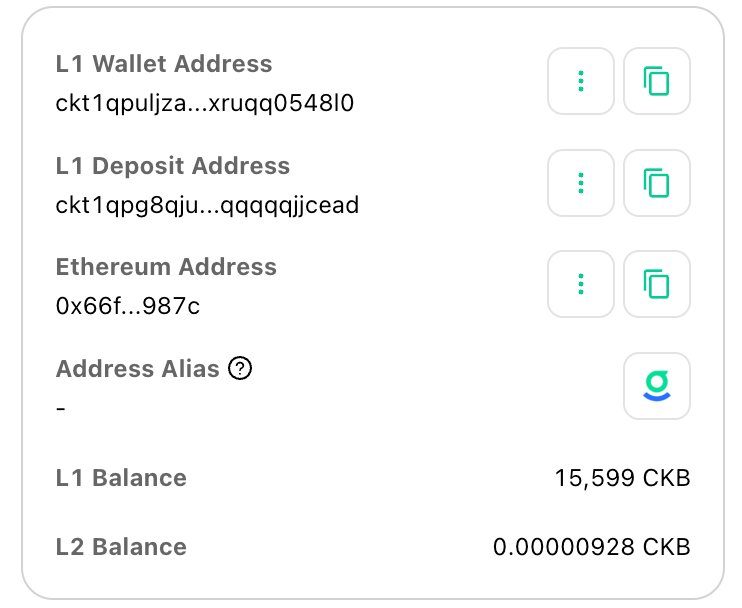
After using Layer 1 faucet, your "L1 Balance" should be equal to "10,000 CKB" or more.
3. Create Layer 2 Account
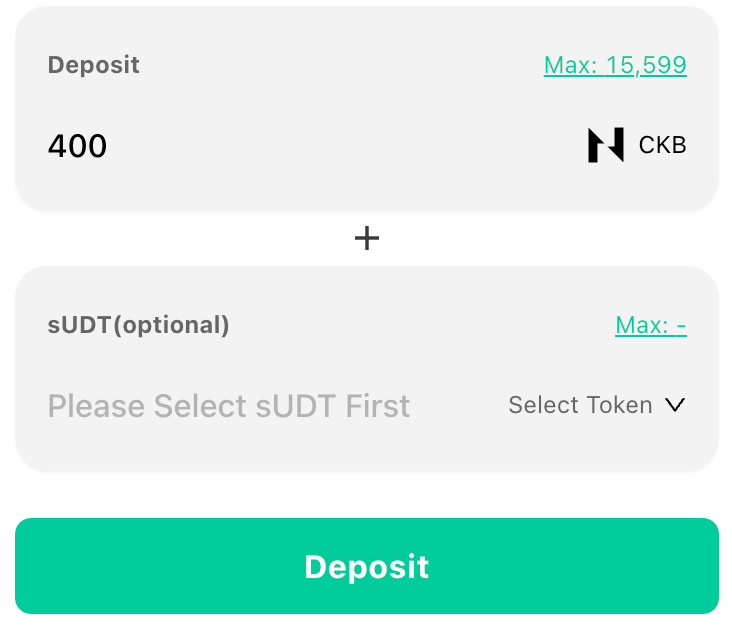
3.1 Deposit to L2 account
Make sure the previous step is complete, and your Layer 1 account is funded.
Now type minimum "400" in the "Deposit" field. Then click the "Deposit" button.
3.2 Transcation Signature
You will be asked to sign a message in your wallet. The process will begin after you sign. Your account should be created in a few minutes.
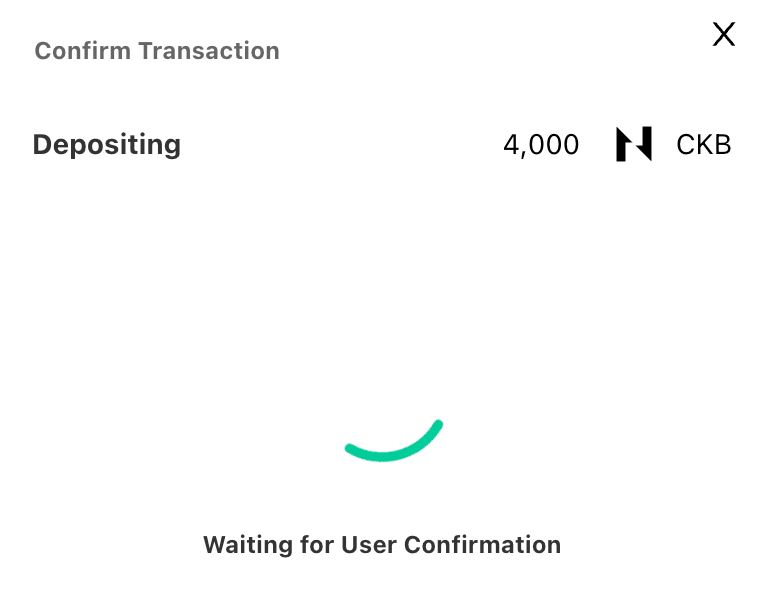
Transcation dialog
In the Godwoken Bridge interface, you will see the following screen, indicating that the transaction is awaiting confirmation.
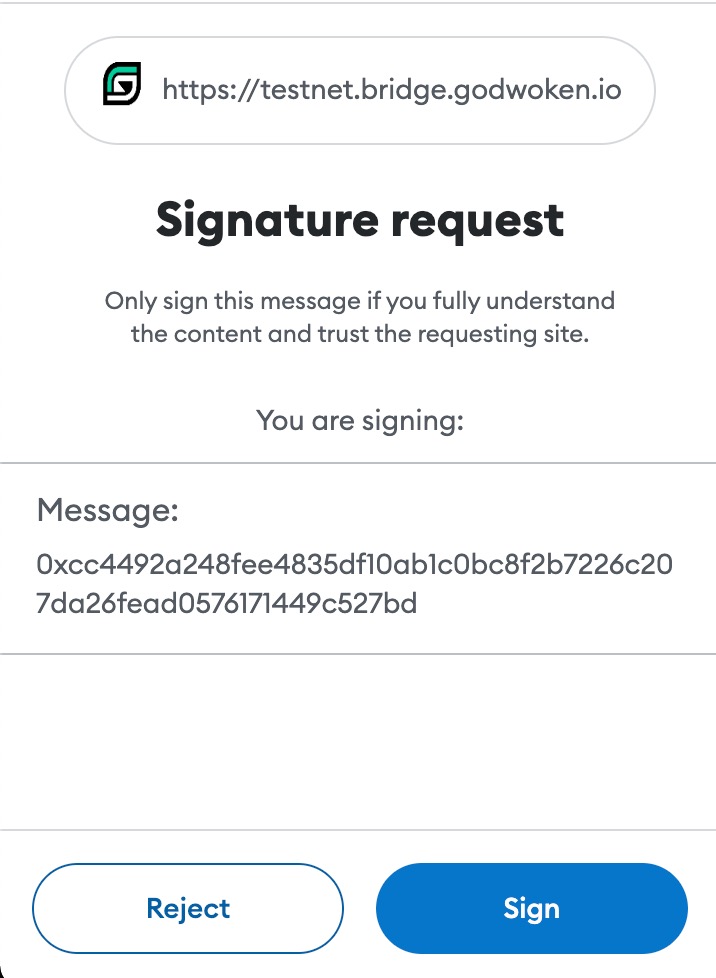
Metamask dialog
On the right side of your browser, you will see a MetaMask pop-up window as shown below. You will need to sign this transaction.
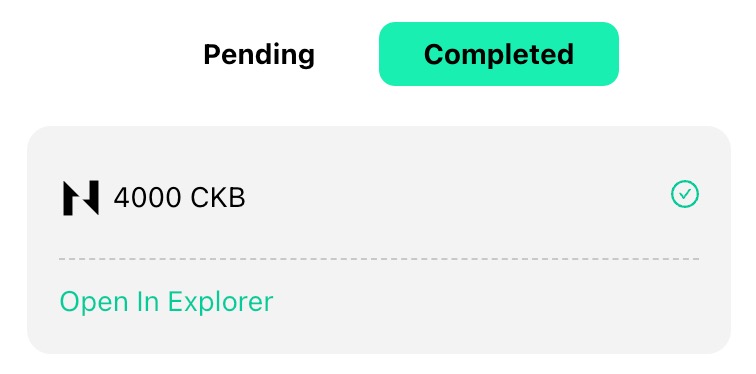
4. Transcation Record
After you "Sign" the transaction, you should see your deposit in Pending transactions.
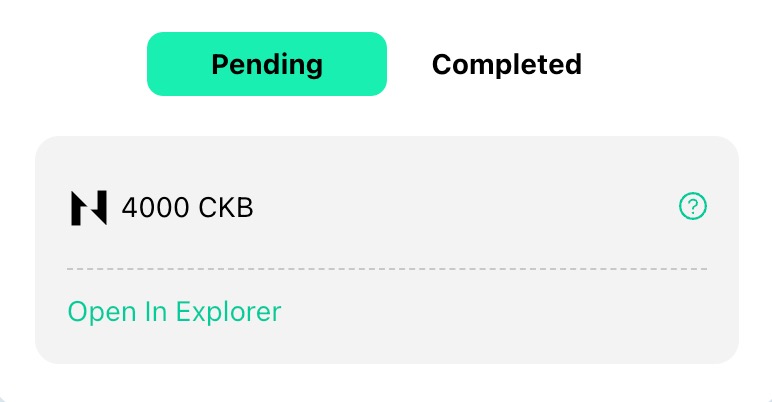
After a few minutes, your deposit should land in Completed transactions.
Congratulations! Your account is now created!